In this section, we discuss 2 unique workflows which are provided by the program.
When you have a series of photos with the same problems you don't need to process them one by one. You can open the first photo in the serial to edit and then apply to others. The steps which can be applied to other images shall be 'contents independent', which means the parameters shall be the same between images, and no local selection is applied. We call those steps the 'automation-steps'. An automation-step can be any filters and functions EXCEPT:
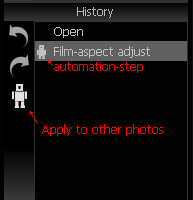
You can easily tell an automation-step in the history window where a robot icon shows. After the first image has been processed, click the big robot icon on history window to apply all automation-steps to other photos.
With this feature, the job gets easy by repeating the same steps on the rest of the photos. You can also save the steps into a 'Scheme' file for later use in 'Instant filer' or '‘Batch processing'.
A selected area is a mask over the image. Within the selection, where mask value is 255, functions and filters take effect fully. Outside it, no change happens. The mask value, varied from 0 to 255, refers from non-selected to whole-selected. A feather function can be used to define the half-selected area, which controls the gradients of the effects.
The selected area makes it possible to adjust a photo locally. But that's not enough. Considering this scenario: multiple selected areas are needed for different processing parameters, what will happen in traditional software and the Recomposit/Light Developer? For traditional softwares, the workflow may looks like this:
- Select areas and store it to list
- Restore first area
- Call a function to adjust this area, click OK
- Restore another area
- Call a function to adjust this area, click OK
- Repeat above steps…
While in the Recomposit/Light Developer, the workflow can be optimized to this:
- Select areas and store it to list
- Call a function, adjust current area, click Apply
- Change to another area, different parameters, click Apply
- You may change functions, but in each function, you can adjust each area without quitting.
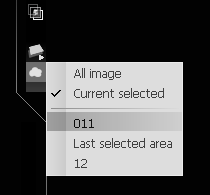
The ‘Filter Dialog’ can switch areas by clicking on the mask button.

